Table of Contents
ToggleAn LG refrigerator that won’t cool or freeze is a kitchen emergency, and one that often feels more expensive than it really is. Before you shell out $200+ for a service call, there’s a solid chance the problem is something you can diagnose and fix yourself in under an hour. Most cooling failures trace back to simple culprits: a misadjusted thermostat, clogged condenser coils, a broken door seal, or a blocked airflow. This guide walks you through seven practical troubleshooting steps that address the most common causes. You’ll learn what to check, how to clean what needs cleaning, and exactly when it’s time to admit defeat and call a professional.
Key Takeaways
- An LG refrigerator not cooling or freezing often stems from simple issues like thermostat misadjustment, clogged condenser coils, or broken door seals that you can diagnose and fix in under an hour.
- Clean the condenser coils every 6 months using a soft brush or coil cleaning brush to prevent dust and debris buildup that forces the compressor to fail.
- Test your door gasket with the dollar bill method to identify leaks; replace it immediately if cracked or hardened, as a faulty seal lets cold air escape and warm air leak in.
- Ensure proper airflow by keeping your LG refrigerator at least 2–3 inches from the wall and clearing any food or ice blocking interior vents, as poor ventilation causes the fridge to overheat and stop cooling.
- Listen for compressor humming and evaporator fan whirring; if you hear neither, the issue is electrical and requires a licensed technician to prevent further damage and warranty voidance.
- Call a professional technician if the compressor isn’t running despite a working outlet, or if refrigerant-related issues like leaks or expansion valve failures are suspected, as these require EPA certification and diagnostic equipment.
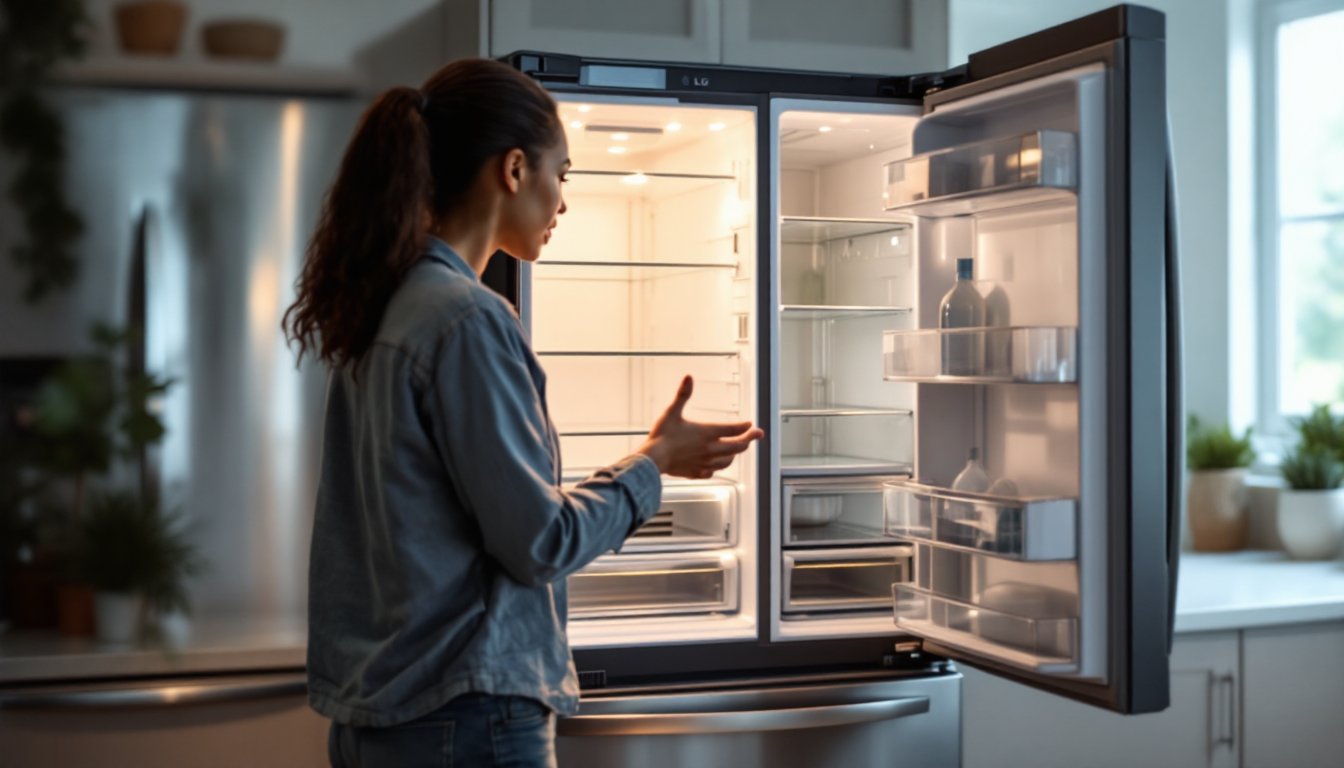
Check the Thermostat and Temperature Settings
This sounds obvious, but it’s the first place to look and it catches people off guard more often than you’d think. LG refrigerators typically have a digital or mechanical thermostat, and if the dial or setting has been bumped to a warmer position, or accidentally turned to “off”, your cooling stops immediately.
Locate your thermostat control. On most LG models, it’s inside the fridge compartment, either on the back wall or inside the upper door. If it’s a mechanical dial, turn it all the way to the coldest setting, wait 10 minutes, and listen for the compressor to kick in. You should hear a soft humming sound: if nothing happens, move to the next step.
If it’s a digital control panel (common on newer LG models), make sure the temperature is set between 35–38°F for the fridge and 0–5°F for the freezer. Some LG refrigerators have a “cooling off” button or setting that users accidentally press. Check your user manual to confirm your model’s correct settings and make sure nothing’s been toggled to the off position.
Also verify that the fridge isn’t in “Demo Mode” (a display-only setting used in stores). Depending on your model, holding a specific button combination or accessing the service menu can toggle this. If Demo Mode is active, the compressor won’t run. Check your manual for the exact key sequence to disable it.
Clean or Replace the Condenser Coils
The condenser coils, the thin aluminum tubes usually located at the bottom back of your fridge or underneath the unit, release heat from the refrigerant. When they’re clogged with dust, pet hair, or debris, they can’t dump heat efficiently, and your fridge struggles or stops cooling altogether.
Unplug the refrigerator before you start. Locate the condenser coils. On most LG models, they’re accessible via a front-facing grille at the base of the unit or behind a rear panel. You’ll see a flat, thin-finned coil assembly.
Use a soft brush (a 2-3 inch paint brush works fine) or a coil cleaning brush to gently brush away dust and debris. For stubborn buildup, use a shop vacuum on low suction while brushing. Do this carefully so you don’t bend the delicate fins. If the fins are severely bent or the coils look corroded, you’ll need a replacement coil assembly, a $150–$400 part depending on your model, which is worth ordering online rather than paying a technician to install.
After cleaning, plug the fridge back in and wait a few hours. If it starts cooling normally, you’ve solved the problem. Condenser coil cleaning should happen every 6 months if you have pets or a dusty home.
Inspect the Door Seals and Gaskets
A faulty door seal (or gasket, the rubber strip around the edge of the door) lets cold air escape and warm air leak in, forcing your compressor to run constantly and eventually fail. Even a small gap compounds over time.
Close the door on a dollar bill so it sits halfway in the seal. Try to pull it out. If the bill slides out without resistance, the seal is compromised. Do this test all the way around the door to identify soft or damaged spots.
Next, look for visible cracks, hardening, or separation from the frame. Over time, gaskets shrink and lose flexibility, especially on older LG models. If the gasket looks fine but the test fails, the seal might just need deep cleaning. A buildup of crumbs and grime can prevent a tight closure.
Clean the gasket and the frame around the door with warm soapy water and a soft cloth. For stubborn gunk, use a toothbrush. Dry thoroughly and retest.
If the gasket is cracked, hardened, or won’t seal even after cleaning, it’s time to replace it. LG door gaskets typically cost $50–$150 depending on the model, and swapping one takes 15 minutes: you’ll find screws or clips holding it in the frame, remove them, and slide the new gasket into place. Order the correct gasket for your LG model number (usually found on the back or inside the door jamb) to ensure it fits properly.
Verify Proper Airflow and Ventilation
LG refrigerators need unobstructed airflow around the compressor and condenser coils. Poor ventilation causes the fridge to overheat and stop cooling. Check that the fridge is at least 2–3 inches away from the wall and that nothing is blocking the vents on the back or bottom.
If the unit is crammed into a tight cabinet or alcove with minimal clearance, that’s a problem. Slide the fridge forward a few inches and see if cooling improves over the next hour or so. The compressor will run hotter and work harder in a confined space, so proper spacing is essential.
Inside the fridge, blocked vents are equally important to address. The refrigerator compartment has air vents (usually holes on the back wall or top) that allow cold air from the freezer to circulate. If food, ice, or debris is blocking these vents, the fridge won’t cool evenly or at all. Clear away any obstructions. Check the freezer as well: if the evaporator (the cold coil in the freezer) is iced over, it blocks airflow too, which ties into the next section.
Test the Evaporator Fan and Compressor
The evaporator fan circulates cold air from the freezer coil throughout the fridge and freezer. If this fan isn’t spinning, the freezer might get cold but the fridge won’t. The compressor is the motor that pressurizes the refrigerant and drives the whole cooling cycle: if it’s not running, nothing works.
With the fridge plugged in and running, place your ear near the back wall of the freezer compartment. You should hear a faint humming from the compressor and a low whirring from the evaporator fan. If you hear only compressor humming but no fan sound, the fan motor may be seized or failed, a $200–$350 repair.
If you hear nothing at all, the compressor might not be running. Check that the fridge is plugged into a working outlet (test the outlet with a lamp first). Make sure the power cord isn’t damaged. On some LG models, there’s a start relay (a small cube-shaped part attached to the compressor) that can fail: if you’re comfortable opening the fridge and checking for obvious damage, you can unplug it and inspect for burn marks or corrosion. A faulty relay costs $50–$150 and can be replaced without specialized tools, though this is where many people decide to call a pro.
If the compressor isn’t running and the outlet works, the problem is likely electrical and beyond a standard DIY fix. At this point, a technician visit makes sense.
Check the Defrost Cycle and Drain System
Your LG fridge goes through automatic defrost cycles to prevent ice buildup on the evaporator coil. If the defrost heater or thermostat fails, frost accumulates, blocks the coil, and cooling stops. You’ll often see ice inside the freezer and sometimes water pooling at the bottom of the fridge.
Look inside the freezer for excessive frost or ice on the back wall or coils. A light layer is normal: thick buildup is a red flag. If you see significant frost, the defrost system isn’t working.
The drain system removes melted frost as water. Most LG models have a small drain hole at the back of the fridge and a drain pan underneath. Check that the drain hole (usually a small opening on the back interior wall) isn’t blocked by ice or debris. You can carefully use a pipe cleaner or small plastic tubing to flush it with warm water (don’t force anything, you can damage the line).
Also locate the drain pan under the fridge (accessible from the front or rear, depending on your model) and empty it. Algae and bacteria sometimes clog the pan. Rinse it with warm water and set it back in place.
If the defrost heater or thermostat has failed, you’ll likely need a technician. These are $100–$250 parts, and diagnosing which one is faulty requires a multimeter and some electrical knowledge. But, clearing a blocked drain is something any homeowner can do in 10 minutes.
When to Call a Professional Technician
If you’ve worked through all six steps above and your LG fridge still won’t cool, it’s time to stop troubleshooting and call a licensed repair technician. Specifically, a technician is needed when:
The compressor isn’t running and the outlet works. This points to an electrical failure, a faulty start relay, or a dead compressor motor. These repairs require diagnostic equipment and sometimes refrigerant handling (which requires EPA certification).
You hear the compressor running but no cold air is produced. This suggests a refrigerant leak, a faulty expansion valve, or a clogged capillary tube. Refrigerant handling and pressure testing are licensed jobs in most jurisdictions.
The defrost heater or thermostat has failed. While parts are inexpensive, diagnosis requires a multimeter and understanding of electrical schematics. Misdiagnosing costs money and time.
You’ve cleaned everything and sealed gaps, but frost still builds up excessively. This often means the defrost cycle isn’t working, which circles back to electrical or refrigerant issues.
A repair call typically costs $150–$300 for the service visit alone, plus parts. But, attempting complex refrigerant or compressor work without certification can damage the unit further and void your warranty. Get a quote before committing, and compare it against the cost of a newer LG model if your fridge is over 10 years old. You can find tested appliance reviews and repair guidance and practical kitchen appliance advice from trusted sources when making the call.